Vegan Coconut Whipped Cream Made From Only 3 Natural Ingredients / Cheap / Easy / Fail Proof

The concept of making whipped cream out of a can of coconut milk is not a new one. You may be asking yourself, “why on earth would she create a post on something that has already been done?” My response to that is two words that are stated in the title: “fail proof.”  I have attempted making coconut whipped cream numerous times with an unfortunate attempt to failure ratio. It was not as simple as many bloggers portrayed it to be… At least not for an amateur such as me. It took monotonous attempts and several hours of research (admittedly, yes, you read that correctly) for me to finally discover what factors were ensuing bad results. It is only just that I give you an admonishment by informing you of what went wrong for me.  

  1. I used canned coconut MILK instead of cream. Nearly every recipe I’ve seen involves the use of coconut milk, however, coconut milk has never worked out for me. While it certainly is possible to derive a whipped cream from coconut milk, coconut cream contains more fat and has a greater percentage of the hard mixture that floats to the top of the can when it is chilled. That mixture is what creates the lovely whipped cream texture. Since canned coconut cream contains more of that firm substance, it yields more whipped cream and consistent results. 
  2. I used the wrong brands. Unfortunately, some brands do not yield good results. Some use thickeners that prevent the cream from separating easily. This method will only work if the thick cream separates from the thin, watery substance so the thick stuff can be extracted for use.
  3. I mindlessly poured some of the coconut water in with the cream. Again, I used brands that did not allow for the cream and water to separate. Going back to the 2nd point, if you are using a brand that does not allow the cream to distinctly separate from the coconut water, it will evoke ramifications. The cream will be too thin to transform into a whipped cream. 
  4. I underestimated the importance of keeping everything as. chilly. as. possible… The chilling process of the cream AND the tools used is crucial. Prior, I have skipped this step out of hastiness.  If this is done, the whip will be thin and runny rather than fluffy. If the cream becomes too warm mid mixing and it is not whipping how I want it to, I often place the whipped cream into the freezer for 10 minutes. This tip can be strongly lucrative.

After finally achieving successful results, I was effectuated with the fact that a can of coconut cream can elicit a delightfully yummy whipped cream. I maintain that level of exuberance even today. How can something made of such simple ingredients be so tasty and scarcely distinguishable to its unhealthy competitor? How can it be dairy free, vegan, cheap, and simple to make all in one? It is truly remarkable!

I hope you love this recipe as much as I do! If you try it out and decide to share your creation on Instagram, please tag me @healthy.delish so I can see your wonderful creations. Happy whisking 🙂

Make sure to check out the notes underneath this recipe to ensure consistently perfect results!

Vegan Coconut Whipped Cream

INGREDIENTS

  • 1 14 oz can of full-fat coconut cream (chilled in a fridge for at least 6 hours) * see notes
  • 1 teaspoon vanilla extract
  • 1 Tablespoon maple syrup, or another liquid sweetener of choice

INSTRUCTIONS

1. Chill a kitchen aid bowl and its beater in the freezer for at least 30 minutes.

2. Take the pre-chilled coconut cream out of the fridge. Do not shake it. Separate the hard coconut cream that floats to the top and place it in your Kitchen Aid. It should have separated through the chilling process. Make sure not to accidentally add excess liquid from the can, as it may result in too thin of a consistency to achieve a stiff whip.

3. Add the rest of the ingredients and allow the kitchen aid to whisk until the mixture is fluffy and stiff peaks form.

4. Serve immediately or chill for up to 5 days. The whipped cream will become more firm the longer it sits.

5. Add this whipped cream to anything you would pair traditional whipped cream with. Fruit (strawberries, grilled peaches), milkshakes, and brownies are just a few examples.

NOTES

  • If you don’t have a kitchen aid, you can substitute it for a chilled hand mixer.
  • Brands with ingredient lists of only coconut and water often yield the best result.
  • Don’t throw away the excess coconut water left after you separate the cream. It contains great nutritional value and is divine in things like smoothies.
  • Be aware that some brands don’t result in the separation of coconut cream and water, and therefore will not work for this technique. I have had great success with this brand.
  • If you are in the middle of the whisking process and realize the cream is too warm, place it in the freezer for about ten minutes to allow it to stiffen up.
  • When buying coconut cream, give several of the cans a shake. If you can’t hear any liquid, that is a GOOD can since it is filled with mostly coconut cream. If it sounds like it contains a lot of liquid, it is probably excessively watered down and won’t work as well.
  • If for some strange reason your cream is not whipping to the texture you desire, add around 1/4 tsp of xanthum gum to thicken it up. Powdered cashews is another alternative to help it thicken.
  •  This whipped cream thickens the longer it sits. 
  • To achieve a crisp presentation, add the whip to a zip lock bag or piping bag.

Free of EVERYTHING Mug Brownie (Healthy,Vegan, Gluten Free + Dairy Free)

The venerate mug brownie will forever hold a special place in my heart as it was one of the first creations I consistently made as a ten-year old child. My knowledge and skill in the kitchen was exponentially lacking, but mixing stuff in a mug and pressing buttons on a microwave is something achievable by even the simplest of minds. At one point, I was making a mug brownie nearly every night… that was before I grew health-conscious and realized the long-tern damage of indulging in brownies every night haha.

Of course, this recipe contains obvious appeal as it is substantially more nutritious than its competitors, but even the fact that it is made of oatmeal instead of flour makes it that much more captivating. Just to list a few of oatmeal’s merits…

  • It is CHEAP – you can buy a whole box for… around two bucks! #score
  • Oatmeal results in a FUDGY texture – Oatmeal’s uniquely creamy texture contributes to the irresistible texture of these brownies.
  • Oatmeal is accessible – Nearly everyone already has oatmeal in their pantry.
  • It is HEALTHY – Haha… Duh.

Free of EVERYTHING Mug Brownie

This lovely recipe comes together almost instantaneously and involves only 5 whole ingredients. The only thing holding you back from whipping it up RIGHT NOW is two minutes of your time… literally.

Servings: 2

INGREDIENTS

  • 1/4 cup oat flour (roughly 1/3 cup of blended rolled oats that is sifted)
  • 2-3 Tablespoons Cacao or cocoa powder
  • 1/2 teaspoon vanilla extract
  • 1 Tablespoon coconut oil, melted (or other light oil)
  • 2 Tablespoon maple syrup
  • 3 Tablespoon water (or nut milk for a creamy alternative)

INSTRUCTIONS

  1. Whisk all the ingredients in a large mug until smooth. Microwave the mix for 60-90 seconds, or until a toothpick stuck in the enter comes out clean. Alternatively, you can choose to undercook the mug brownie for a gooey, lava cake-like creation.
  2. Top with anything you please, such as dairy-free vanilla ice cream, raspberries, or dark chocolate. Serve immediately.

NOTES

  • You can replace the water or nut milk with coffee for a fun alternative.
  • Consider experimenting with fun additives such as orange, mint, berries, dark chocolate, nuts + nut butter, ect.
  • Want to make a cake instead of a brownie? Simply add an egg to the mix… or better yet… also add chocolate (preferably dark) in the center for a melty “lava” cake.

Magnolia Table’s Famous Syrian Donuts Recipe REVIEW

My grandma and aunt started a family tradition that has involved going through and creating EVERY recipe in the Magnolia Table cookbook. I was assigned two recipes and the one at the top of my two item “to cook” list was inevitably donuts… my greatest obsession. These donuts were drastically different from other’s I’ve tried, partially because of the inclusion of aniseed (what gives licorice its flavor). I was a bit skeptical of that addition since I don’t particularly like aniseed, but I decided to give it a try for the mere fact it contained the word “donut” in the title (always a selling factor for me).

As you may know, my blog is dedicated to simple and healthy (mostly vegan or dairy free) recipes. This particular recipe happens to be neither of those things, but I am perfectly ok with making an exception for the involvement of donuts (can you tell I like donuts lol). I also thought this would be a great chance do a recipe REVIEW since I have never done one before.

Getting Started…

When I discovered this recipe required at least 3 hours and 45 minutes to complete, I got a bit worried since I usually take even longer than recipes recommend. However, It truly wasn’t bad at all since a majority of the time (two hours) was simply waiting on the dough to rise. Still, making these donuts wasn’t exactly a breeze. The first dilemma arose when I discovered we were out of parchment paper. I was not about to stop the baking process because of this small hiccup and opted by using cooking spray (not my favorite option but it worked in a pinch). I also couldn’t find ground aniseed at any grocery store and ended up having to blend whole aniseed to grind it. As mentioned above, I’m not the hugest fan of aniseed and added the lesser recommended amount of it (2 teaspoons) to the dough. It was very subtle but added a lovely kick.

This recipe involved mixing chopped nuts INTO the dough which created a crunch I have never experienced in a donut. I ended up slightly pulsing the nuts in a blender rather than chopping them because I would rather there be too small of chunks than too big. I feel that was a good decision because the end result yielded a consistent nutty flavor in each bite.

The book mentioned how the dough should be dense… and it certainly fit that description. It was also super dry and crumbly so I had to add an extra 1/4 cup of water. That small addition helped the dough immensely. Still, the dough remained dense. It didn’t even rise during the two hour dedicated rising time (this, however, could have been a mistake caused by the yeast I used).

The last change I made was substituting whole milk for almond milk. I made this change since I hardly consume any dairy if I can control it.

In Conclusion:

If I were to try to describe these donuts to you, I would say “imagine a traditional donut and…. throw that image in the trash because they are nothing alike.”😂 Truly, the only similarity the two share is a center hole. The texture of these “donuts” are dense, crumbly, and firm. They are more comparable to a bagel with glaze. The flavor is unique, but if I’m speaking honestly, I was slightly disappointed with the results because it was no where near what I was expecting. This could very well just be because of personal errors, but I followed the instructions closely. I probably wouldn’t try these again if they turned out this way every time, but I truly believe that, with more practice, they could turn out wonderfully. This would also be a fun recipe to take on if you are feeling adventurous and want to complete a more difficult baking task. If you do plan on trying this recipe, I highly recommend doing so during the fall time because the flavors and spices are practically an epitome of the fall season.

Alternations I Made:

  • 1 cup sugar was added to the dough instead of 2 cups
  • 2 teaspoons of aniseed was used in the dough instead of 3 teaspoons
  • regular milk was replaced with almond milk
  • An extra 1/4 cup of water was added to the dough to help with dryness

Tip:

A small tip I’ve acquired from baking more difficult recipes (or really anything at all) is to gather all the ingredients and measuring cups and spoons needed BEFORE beginning the baking process. It seems like the simplest thing but it really does make the baking process go much smoother.

Healthy 20 Second Multipurpose Chocolate Syrup – made from maple syrup (3 ingredients)

Thanks to this recipe, you can now trash the crusty bottle of Hershey’s chocolate syrup you have that has most likely been lying around in your fridge for YEARS (I know you have one) and replace it with this healthy alternative. This new and improved version is great for many things… hence the word “multipurpose” placed in the title. You can drizzle this syrup on anything traditional chocolate syrup is good on. Some ideas of things it would pair nicely with include…

  • nicecream (banana nicecream)
  • yogurt
  • coffee drinks
  • vegan ice cream
  • pancakes or waffles (the two are interchangeable)
  • oatmeal
  • protein shakes.

You could also dip strawberries into the syrup, use it in the creation of a healthier frappuccino, or add to milk for an instant chocolate milk. The options are endless.

There are many reasons to love this recipe, but convenience is at the top of the list. Unlike the making of traditional syrup, there is no heat involved. We are taking advantage of the natural texture of nature’s maple syrup without the lengthy process of making homemade syrup that involves boiling and simmering a sugar mixture. It takes a small MAX of 20 seconds to whip together this indulgent drizzle.

Healthy 20 Second Multipurpose Chocolate Syrup

INGREDIENTS

  • 1/4 cup 100% pure maple syrup
  • 2 Tablespoons cocoa or cacao powder (I prefer the flavor of Cacao)
  • 1/2 teaspoon vanilla extract

INSTRUCTIONS

1. Add the maple syrup and vanilla extract to a bowl.

2. Sift the cocoa powder into the maple syrup and stir with a whisk or fork until the cocoa powder is fully incorporated

3. Store in an airtight container. I usually store in a mason jar. Make sure to stir syrup before each use because the cocoa powder may separate over time.

NOTES

  • For a non-vegan alternative, you can substitute maple syrup with honey.
  • This recipe can easily be doubled or halved in order to fit your specific need for the syrup.
  • if you would like a less sweet syrup, you can substitute a fraction of the maple syrup with water.

Healthy Vegan Chocolate-Blueberry Frozen Yogurt (only 3 ingredients)

I was debating with myself (as I often do lol) for quite some time on whether I should make a recipe for dark chocolate BLUEBERRY frozen yogurt or dark chocolate CHERRY frozen yogurt. Evidently, I chose the blueberry and chocolate combo as it is less common but JUST as tasty, in my books. That being said, you can, of course, substitute blueberries with really any fruit there is. The obvious substitutions would include other berries like raspberries or blackberries. Orange or coconut would also make another exquisite flavor profile with chocolate. Just remember to allow your frozen fruit to slightly thaw for at least 5 minutes before placing it in the blender to prevent the creation of an “icy” frozen yogurt… unless that is what you want. 🤷🏻‍♀️

Healthy Vegan Chocolate-Blueberry Frozen Yogurt (only 3 ingredients)

INGREDIENTS

  • 4 cups frozen blueberries
  • 3 Tablespoons cocoa or cacao powder

Optional:

  • Maple syrup or other sweetener
  • Vanilla extract
  • dark chocolate shavings

INSTRUCTIONS:

1. Allow the frozen blueberries to slightly thaw for 5 minutes while you gather the remaining ingredients. Blend everything in a high speed food processor or blender until creamy (make sure you don’t over blend or it will melt). You may need to occasionally scrape down the sides of the processor with a spatula to help everything get incorporated.

2. Serve immediately for a soft serve yogurt or freeze for another 10-30 minutes to obtain a more firm texture. Of course, you can store this froyo in the freezer in an airtight container (for up to 3 months), but you will need to allow the froyo more time to thaw before serving (around 20 minutes).

3. You can make this sweet treat more elegant by adding chocolate shavings.

NOTES

  • Vegan yogurt can be substituted for regular greek yogurt.
  • Blueberries can be swapped with an other frozen berries or fruit of choice.
  • Feel free to get creative and add any extra additives of choice such as coconut, orange zest, almond extract, etc.
  • If you want a consistent flavor, add all the ingredients and blend. If you would rather have some fruit chunks, add all the ingredients except 1/2 cup of reserved frozen blueberries. Blend until smooth and creamy, then add the rest of the berries. This time, only pulse the processor a few times until the berries are roughly chopped.

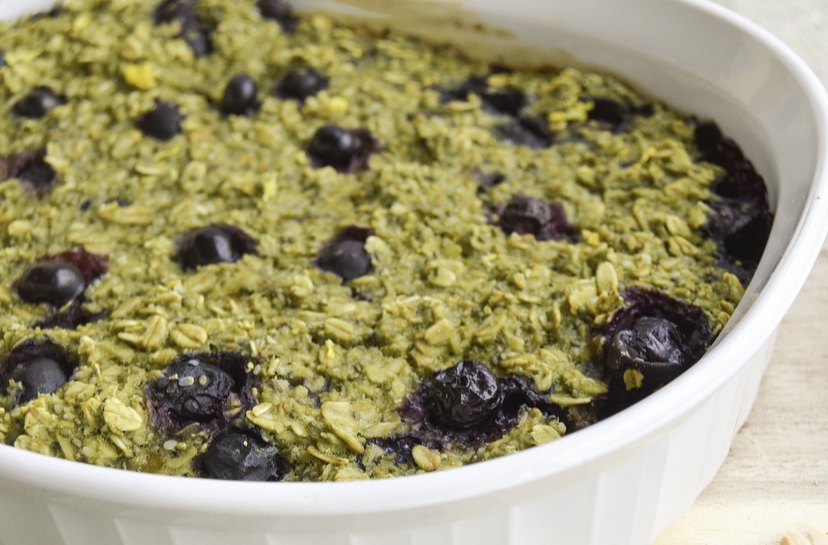
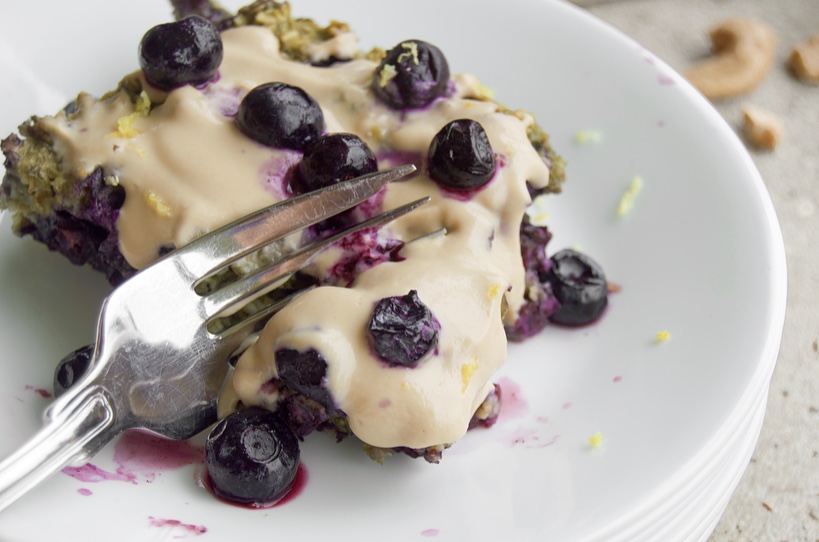
Healthy Matcha & Blueberry Baked Oats With Lemon Cashew Cream {Dairy Free + Refined Sugar-Free}

IMG_1593

I have tried a multitude of oatmeal recipes ranging from cookies, to bars, to cakes, to muffins, to random stuff I don’t even know what to title. Honestly, even with much variation separating those recipes, I find them to often taste too similar to one another and almost…dare I say…bland (*gasp*). I mean, it’s no secret that oatmeal has little flavor, but what really makes it so appealing is its creamy texture (when cooked right), affordable price, and health benefits. That being said, it definitely relies on other ingredients to bring an actual flavor profile. Unfortunately, many of the oatmeal-based recipes I have tried tend to simply plop a banana and maybe some cinnamon into the mix and hope it is flavorful enough. That leads to too much boring similarity.

IMG_1596

The idea of this baked oatmeal recipe was birthed when I realized that the world needed an actual flavorfully vibrant oatmeal recipe that even non-health lovers could enjoy. This recipe is possibly the perfect example of that as it meets all the criteria. By far, the main flavor stars of this recipe are the matcha, blueberries, and lemon. Mmmm, just thinking of those flavors intertwined together makes me hungry! My favorite of those ingredients is most definitely the matcha, which is quite ironic because if you were to ask me two years ago what matcha powder was, I would have no answer to give. You may currently relate to my two years younger self regarding matcha, so let me give a quick rundown on it…Matcha means “powdered tea” and is a powdered green tea. What differentiates matcha from normal green tea is that, with matcha, you are drinking ground up matcha leaves versus leaf-infused water makes up traditional green tea. Besides the given health benefits of matcha, I also love it for its light flavor composition. Plus, it sounds much fancier than boring old “green tea,” haha!

IMG_1595

Now that I’ve told you all the reasons that I am obsessed with this recipe because of the matcha and all the other ingredients used (which I refrained from going into detail about because I expect you already know what they are), here is the recipe! 🙂

IMG_1597

IMG_1592

Healthy Matcha Blueberry Baked Oats With Lemon Cashew Cream

Serves: 9

INGREDIENTS

For the Matcha Oats:

1.) Dry Ingredients

  • 2 cups Rolled oats
  • 3 teaspoon Matcha powder
  • 1 teaspoon baking powder
  • Optional Additives:
  • 1 Tablespoon chia seeds or flaxseed
  • 1 Tablespoon hemp seeds
  • Desired amount of maple syrup or other sweetener

2.) Wet Ingredients

  • 1/2 cup VERY ripe banana, mashed (about 1 medium sized banana)
  • 1 1/4 cup filtered water or plant milk
  • 1 large egg

3.) Others Ingredients

  • 1 cup blueberries

For the Lemon Cashew Cream:

  • 1/2 cup raw cashews (soaked for at least 2+ hours, then rinsed)
  • 2 Tablespoons maple syrup or other natural sweetener
  • 2-3 Tablespoons lemon juice (depending on how tart you prefer)
  • 1/2 teaspoon lemon zest
  • 1/2 teaspoon vanilla extract
  • 1/3-1/2 cup water or plant milk

INSTRUCTIONS

For the Oats:

1. Preheat an oven to 350 degrees Fahrenheit.

2. Mix all the dry ingredients in a bowl. In a separate bowl, add the mashed banana and wet ingredients. Pour the dry ingredients into the wet and combine. Add more water if the batter is too thick or dry.

3. Pour batter into an 8×8 inch pan and bake for 35-40 minutes or until it holds its shape and has slightly browned. Make the lemon cream (instructions below) as you wait for the oatmeal to bake.

4. Serve while hot and drizzle the lemon cashew cream over each individual slice or spread over the entire thing. You can also keep these in a freezer for up to three months.

For the Cream:

1. Add all the ingredients to a high speed blender and process until very smooth and creamy. Add more liquid if the drizzle is not thin and pourable yet. Pour into a mason jar or air right container to store while you wait for the oats to cook. I get the best results by blending in a smaller, single-serving blender. For some reason it blends things up more smoothly, so this might be the case for you.

NOTES

* optional additives can be included such as coconut, other berries or fruit of choice, nuts, etc.

* You can bake this recipe in muffin tins for a fun muffin-like result, but the  cooking time will vary.

* This recipe freezes nicely and can be stored for up to three months in the freezer.

* Mashed banana can by substituted with an equal amount (1/2 cup) of unsweetened apple sauce.

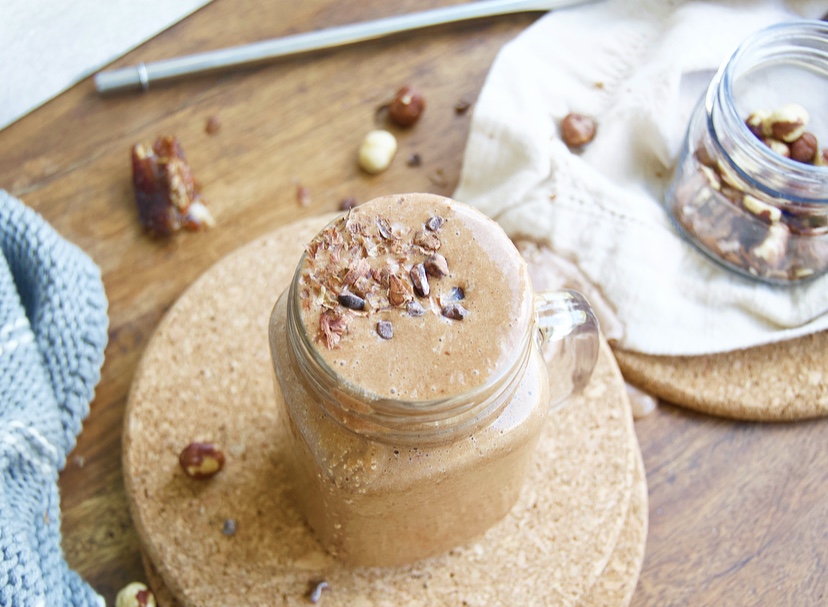
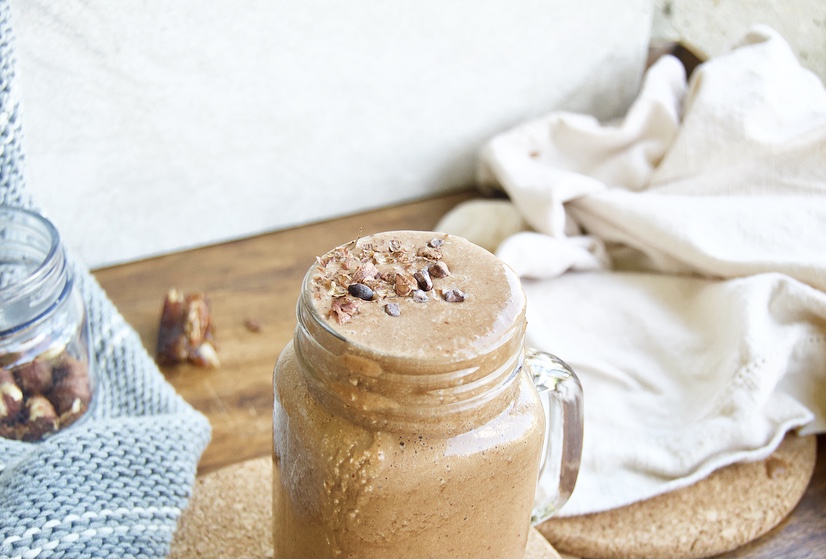
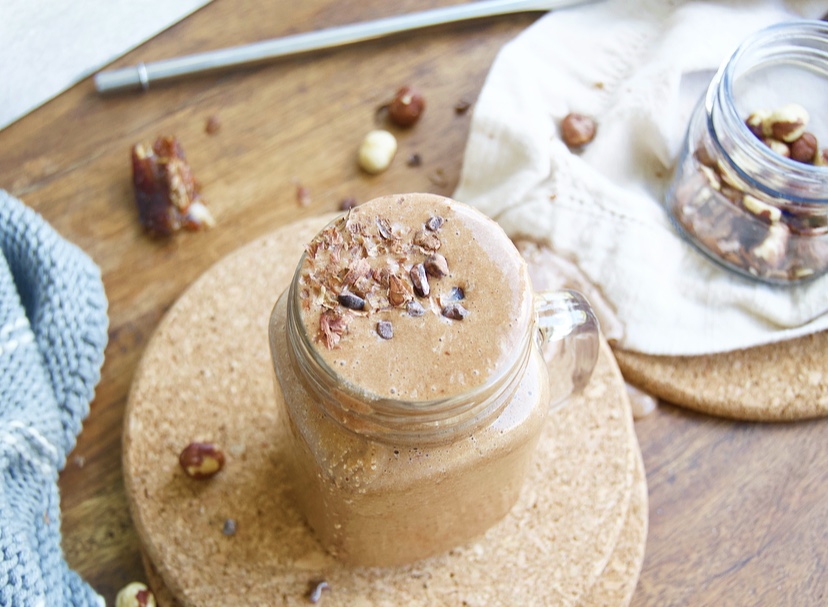
Vegan + Clean Fudgy Nutella Shake (Only 4 WHOLE Ingredients)

I really, truly believe that there is so much beauty found in simplicity. Now, more than ever, it is painfully easy to get carried away with over complicating things that really don’t need it.

This particular recipe is so stinken simple that it almost seems comical to write a whole blog post dedicated to it. It contains only FOUR whole ingredients: raw cacao powder, hazelnuts, bananas, and dates. (yep, that’s right people, you can count them all on one hand). It doesn’t get any simpler than that but the few flavors already present harmonize so well together. 😋

IMG_1031

Because there is nothing but good ingredients in here, it includes many healthy benefits. Here is a little run down of just some of the nutrients you get through the ingredients in this shake…

  • dates

Besides being extremely tasty and curing any caramel cravings that unexpectedly arise, dates are great for promoting brain health, reducing risk of disease, and improve digestion. In this shake they add a wonderfully fudgy flavor making it extra decadent and indulgent.

  • hazelnuts

Unlike a typical vegan shake, there is no store bought, processed plant milk in this recipe. We are essentially making our own hazelnut milk with the addition of hazelnuts which is as clean as it gets! Ever since I found hazelnuts at Trader Joe’s for super cheap I have been on a kick of making this for breakfast every morning. I usually hate having the same thing every day, but exceptions are certainly worth creating for this beauty. Hazelnuts are also a great addition because they benefit your heart, skin, muscles, joints, and digestion.

  • bananas

This very popular fruit is especially well known for containing a high amount of potassium. On top of that, it has high traces of fiber and antioxidants. In this recipe, it provides a wonderful creamy texture that is sometimes hard to obtain.

  • cacao powder

Cacao powder is by far one of my most favorite ingredients EVA! I include in just about anything I can. Cacao powder is made by crushing the bean, then extracting the oils and butter. It withholds natural occurring antioxidants and is rich in magnesium, potassium, and copper. There are many healthy benefits bundled up in the form of cacao powder that I could honestly write an entire blog post dedicated to it (in fact, that is highly likely considering how high on the spectrum of “obsession with chocolate” I stand). Knowing this, you no longer have to feel guilty for indulging in chocolaty treats, especially when that treat is a Nutella hake made fully with whole ingredients! *wink wink*

IMG_1027

Vegan + Clean Fudgy Nutella Shake (Only 4 WHOLE ingredients)

Servings: 2 small or 1 large

INGREDIENTS

  • 2 very ripe bananas, frozen (can be swapped for frozen avocado)
  • 1/3 cup hazelnuts (toasted or raw)
  • 2-3 medjool dates
  • 2 Tablespoons cacao powder (cocoa powder can be used for a non-raw alternative)
  • 1 cup water

INSTRUCTIONS

1. Add the dates, hazelnuts, and 1/2 cup of water to a blender and allow to soak for at least 10 minutes. After soaking, blend until a smooth consistency is formed.

2. Add the frozen bananas, cacao powder and remaining 1/2 cup of water. Blend until smooth and creamy. Add more water if you would like a thinner shake.


NOTES

* If you don’t like the taste of frozen bananas, you can swap them for frozen avocados.

* Hazelnuts can be replaced with different nuts such as almonds or cashews. The flavor won’t be Nutella-like but it will remain just as creamy and delicious.

* For variety, you can blend in additives such as cinnamon, vanilla extract, peppermint, coffee, protein powder, raspberries, coconut, or even cayenne if you’re feeling brave.

* This recipe can easily be turned into nicecream (banana ice cream) or a smoothie bowl simply by adding less or no liquid.

* Dates can be omitted for a less sweet and lower calorie drink.

IMG_1028

IMG_1030IMG_1027

Vegan Earl Grey Tea With Cherry Almond Cashew Milk

I have a sort of love-hate relationship with this little drink here. Though it may seem unlikely, making the recipe for this drink was quite a lengthy process. However, I can substantially feel good about my great number of failed attempts because they lead to one of my most favorite healthy drink recipes everrr!

This whole journey started when I created this healthy cherry almond syrup for my blog. I absolutely love that recipe and I wanted to attempt to use it in a more innovative and creative way. I thought including it in a drink of some sort would be the perfect way to do so. It took about a week of trying a new recipe everyday with slight variations to get to reach ✨perfection✨

Below are my attempts on making this drink (and a realistic representation on how producing even the simplest of recipes can sometimes require a lot of effort…or at least for me lol)

Attempt #1 – I made a COFFEE cherry almond latte with hempseed milk (coffee was the feeble element to this recipe and paired blatantly gross with hemp milk)

Attempt #2 – I created a milk-only “latte” with cherry almond hempseed milk. (I can’t even bring myself to label it a latte without any coffee or tea..it was closer to a warm smoothie. YUCK)

Attempt #3 – I decided to trade hempseed milk with cashew milk in order to obtain a more creamy and frothy drink. The ratios were slightly off so I made notes on how I could improve it for my next attempts.

Attempt #4 – It tasted exactly like what I was going for but I wasn’t ready to photograph it.

Attempt #5 – The drink tasted AND looked yummy and I could now take pictures worthy of my blog haha.

All that was only for an earl grey tea haha (don’t get me wrong, it is some goooood earl grey). The creation of this recipe has certainly helped me discover a freshly peaked appreciation for food bloggers, cook book writers, or really anything pertaining to recipe development. It was never something I fully appreciated until I actually attempted doing it myself. I believe that is a major contribution to the beauty of always trying new things out. You obtain more respect and appreciation towards the professionals who have quite possibly worked a life time on perfecting a certain skill. Haha, I know this got a bit deep, but I truly hope you enjoy this wonderfully light and decadent drink. It is one of my most recent faves and totally beats a Starbucks. The subtle addition of cherry and almond extract to an elegant earl grey is truly an exquisite combination.

Vegan Earl Grey Tea With Cherry Almond Cashew Milk

Servings: 2

Time: 10 minutes

INGREDIENTS

  • 2 earl grey tea bags
  • 2 3/4 cups water
  • 1/4 cup cashews soaked in 1/4 cup of water for several hours (or sub 2 Tablespoons cashew butter ) *see notes
  • 3-4 Tablespoons of just the liquid from this cherry almond syrup
  • 1/8 teaspoon almond extract

Optional:

  • 1/4 teaspoon fresh ginger
  • maple syrup or other natural sweetener
  • garnishes such as earl grey tea leaves

INSTRUCTIONS

  1. Pour a cup of boiling water into two mugs (2 cups total) and let a tea bag steep in each mug for 3-5 minutes.

2. Meanwhile, create the cashew milk by blending cashews WITH the water they soaked in and all the remaining ingredients except any more added water. Blend until completely smooth.

3. Add the remaining water (3/4 cup) to the blender and pulse until smooth and frothy. You can strain the mix for ultra smoothness, but I leave it as is.

4. Distributively pour the cashew milk over the two teas as is, or heat up on the stovetop. If you you have a frother, you can also use that for extra frothiness but just blending the milk froths it nicely as well.

NOTES

* Feel free to get creative and try making a purple latte by replacing the cherries with blackberries or blueberries when making the syrup, or even just to switch the flavor profile up.

* When making the cashew milk, you can replace 1/4 cup of water with coconut milk for a creamy drink with a wider flavor profile.

* For a yummy alternative, consider replacing the tea used with other teas such as chai.

Healthy Apple-Cranberry Baked Oats + Cashew “Cream Cheese” Frosting (Dairy-Free & Refined Sugar free)

I love oats! I doubtlessly have and will always eat oatmeal in just about any form. I think it has something to do with that fact that it holds the honorary title of being the first “real food” I tasted as a baby. I took one bite and was hooked for life.

One of my favorite things about oatmeal is its versatility. My most recent discovery of a cooking form that oatmeal is compatible with is baked oatmeal. When it comes out of the oven, it holds it’s shape. This gives it a revamped muffin-like effect. Another added benefit of baked oatmeal is that it tastes great the next day, or the next, or even after being frozen and reheated. It is super fast and easy to put together for a busy mornings yet still has the qualities to impress any guest. They might not even believe you when they hear that it’s healthy!

This variation of baked oatmeal is ESPECIALLY yummy because it involves a scrumptious creamy cashew frosting (aka NO dairy) that brings its sugar-packed cream cheese frosting competitors to shame. I actually feel like I need to give everyone a warning about the major goodness that is this cashew “cream cheese” frosting (I bet you are all on the edge of your seats in anticipation😂). It is dangerously addictive! I’m not just saying that either. There definitely are worse things to be obsessed with, so eat all the cashew frosting ya like! It’s DELISH!

Healthy Apple-Cranberry Baked Oats + Cashew “Cream Cheese” Frosting (Dairy-Free & Refined Sugar free)


INGREDIENTS

For the Oatmeal:

1.) Dry Ingredients

  • 2 cups rolled oats
  • 2 Tablespoons flaxseed
  • 1 Tablespoon chia seed
  • 1 Tablespoon hempseed
  • 1 Tablespoon cinnamon
  • 1 teaspoon baking powder

2.) Wet Ingredients

  • 1 1/2 cups plant milk
  • 1 very ripe banana, mashed
  • 1 large egg
  • 1 teaspoon vanilla extract
  • 1 teaspoon freshly grated ginger
  • optional: up to 1/4 cup maple syrup or honey

3.) Fruit Ingredients

  • 1 cup chopped apple (around 1 large apple)
  • 1 cup cranberries (other tart fruits such as raspberries, Blackberries, or cherries can be subbed)

For the Cashew Drizzle:

  • 1/2 cup cashews (soak in water overnight, o4 boil for 10 minutes)
  • 2-3 Tablespoons plant milk
  • 2-3 Tablespoons maple syrup
  • 1/2 teaspoon vanilla extract
  • 2 teaspoon lemon juice
  • 1/2 teaspoon Cinnamon


INSTRUCTIONS

1. Preheat the oven to 350 degrees Fahrenheit.

2. Mix all the dry ingredients in one bowl and all the wet ingredients in another. Pour the wet mixture over the dry. Once it is incorporated, fold in the fruit.

3. Pour the batter into an 8×8 baking dish.

4. Bake for 35-45 minutes or until it has firmed and the top is golden brown. Keep in mind that the oatmeal will also firm up more as it cools.

5. While the oatmeal is baking, make the cashew drizzle by adding all the ingredients to a blender. Blend until a smooth frosting-like consistency is formed. Cool frosting in the fridge while the oats finish baking.

6. When the oats are done, drizzle or spread the frosting on top and serve immediately for best results.

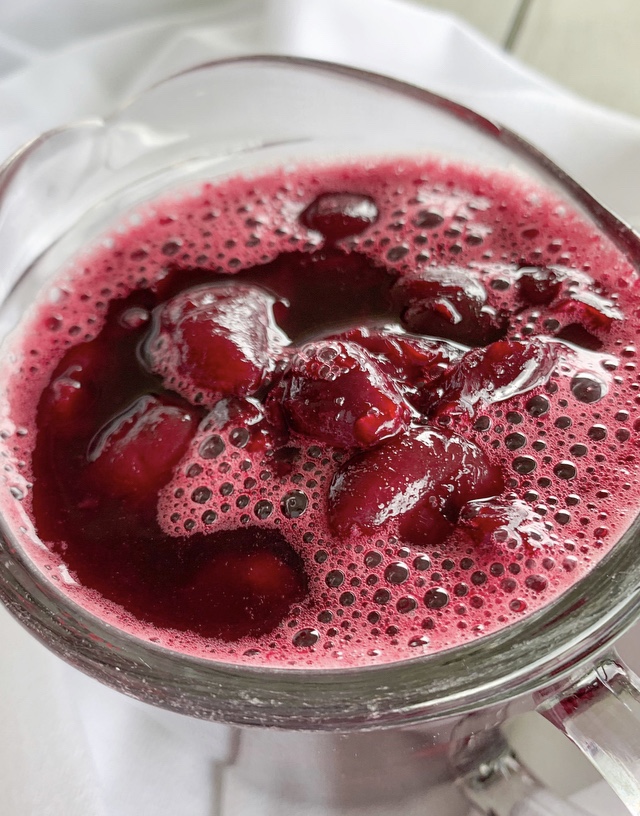
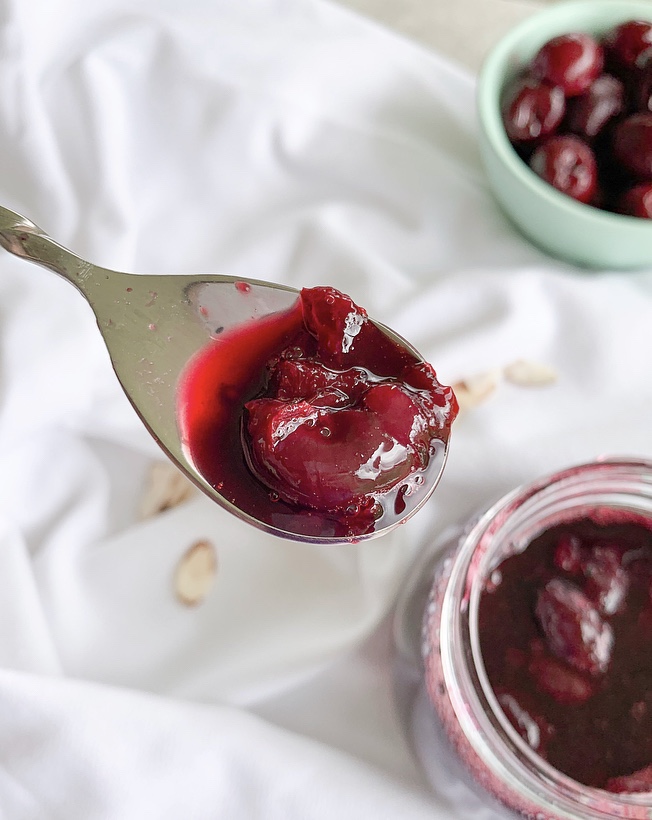
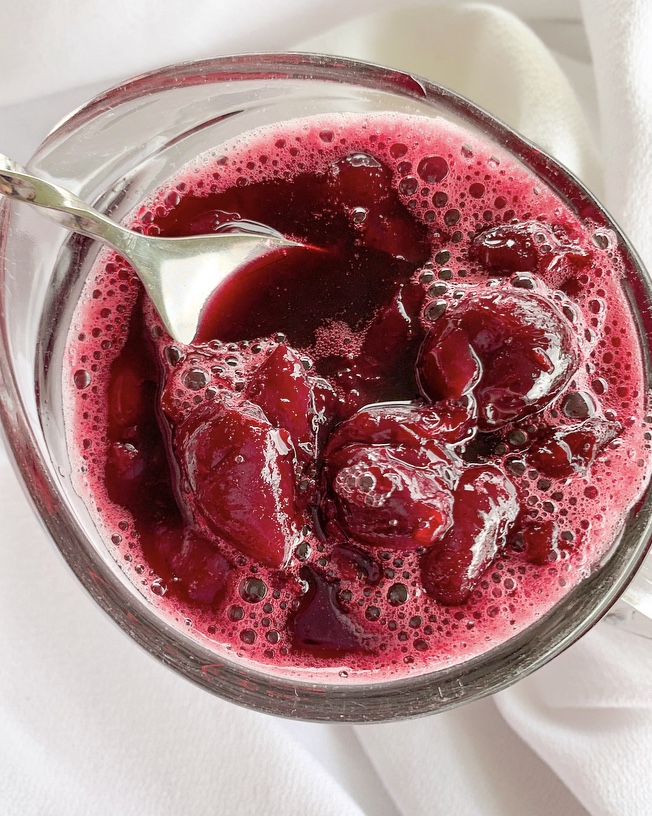
HEALTHY Cherry-Almond Multipurpose Syrup (Vegan + Refined Sugar Free)

It is currently that strange transition faze between winter and spring. My mind is telling me that since warm weather has arrived, I need to accommodate by eating fresh foods that correlate with the better weather of summer. Unfortunately, fresh produce is still either highly overpriced or straight up not in it’s “Primetime” (aka not ripe😳), or both. To some, this may seem like a conundrum, but it only requires a little innovative thinking. The solution is simply to use FROZEN produce. It is cheaper, delicious, and many debate it to be healthier being that it gets picked when actually ripe, therefore containing more nutrients. Some items, like juicy watermelon, can truly never be replaced by its frozen competitors. Don’t worry, though. you can still tackle both your fresh and sweet tooth cravings in one shot with this syrup.

I still remember the first time I ever made a fruit syrup. It was during summertime and I was 11. I spontaneously decided to make some strawberry syrup to go alongside my favorite pancake recipe. I expected many complications to arise considering the outcome of a syrup was in the hands of my 11-year-old self. It was a surprising success. With that grew my ego as I thought I had accomplished something phenomenal. I guess I was partially correct considering that only a tablespoon or two of freshly made berry syrup can jazz up any boring item.

Today’s recipe is bringing back some serious childhood nostalgia and doing so with an updated, healthy twist. This cherry syrup minimalizes added sugar and uses whole maple syrup for an unrefined and vegan sweetness. It also includes the simple yet elegant addition of almond extract which throws this recipe out of the ballpark. It most definitely stands out compared to its simply bland and overrated, storebought competitors.

HEALTHY Almond-Cherry Multipurpose Syrup (Vegan + Refined Sugar-Free)

Makes: 1 1/2 cups syrup (with cherries left in)

Time: 20 minutes

INGREDIENTS

  • 2 cups frozen cherries
  • 1/2 cup water
  • 1 Tablespoon maple syrup (or other sweetener of choice)
  • 1/4-1/2 teaspoon almond extract

INSTRUCTIONS

1. Add all the ingredients to a medium-sized pot. Heat pot to medium-high heat until it starts to boil. Mash Cherries.

2. Lower heat and Simmer for 10-15 minutes. Reduce heat if it starts to boil. stir the mix occasionally. Keep in mind it will thicken as it cools.

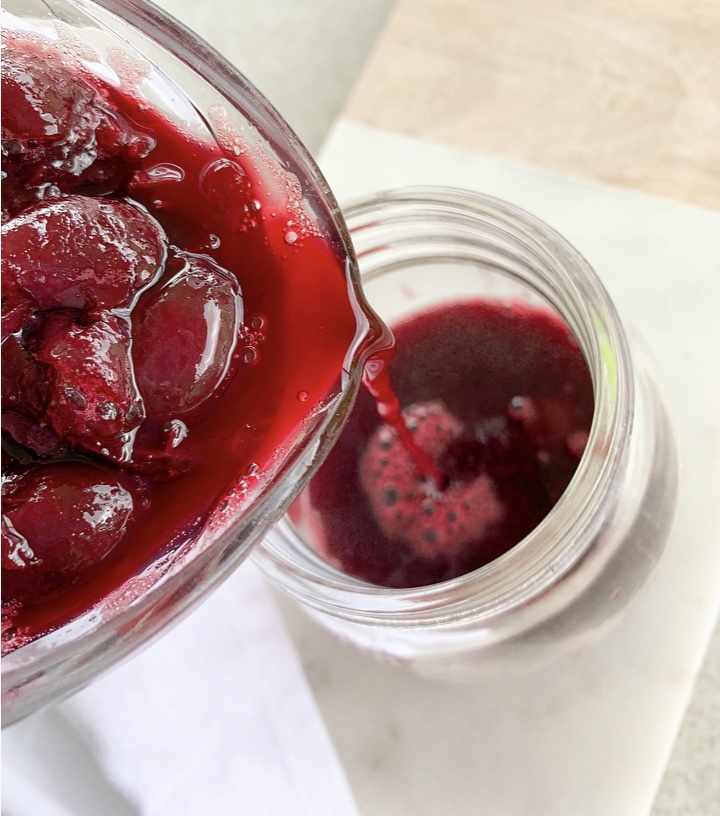
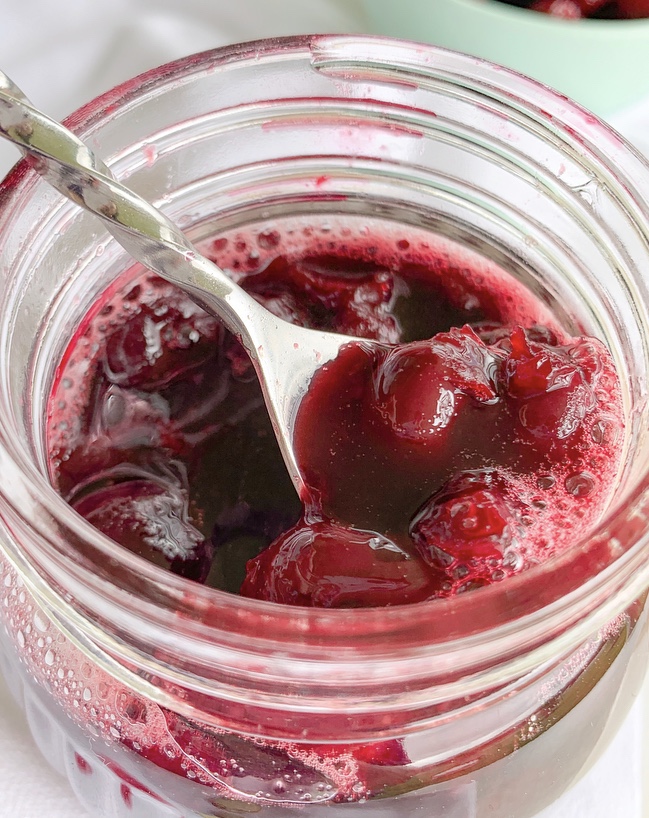
3. You can choose to leave the cherries in the syrup or separate them by pouring the syrup over a strainer. It is up to you. Store in a sealed container in the fridge for up to 2 weeks. for ideas on what to pair it with, check below.

NOTES

* This syrup is fantastic served on oatmeal, smoothies, pancakes, cheesecake, sparkling water, waffles, crepes, cereals, ice cream, angel food cake, lemonade, tea, biscuits, yogurt or even in coffee to make a pink latte.

* Feel free to add more maple syrup or sweetener of choice for a sweeter syrup.

* For customization, you can discard the almond extract or even add other ingredients like cinnamon, cocoa powder, vanilla extract or orange.

*Cherries can be replaced by any other frozen fruits such as raspberries, blackberries, blueberries, ect.

* Fresh cherries can be used as an alternative to frozen, however, the cooking time may vary.